Sunday, November 6, 2011

Traditional Ikebana History

Worldwide, people love flowers! They bring in their homes to admire their beauty and delicious fragrance. In Japan, this love of flowers is raised to an art form called Ikebana.
Ikebana, a traditional Japanese art, is over 700 years and has flourished at the time of Muromachi (1333 to 1568). Ikebana means "the art of giving life to flowers." Also called KA-DO, or "way of flowers". An art that has its roots in offering flowers to Buddha, in the fifteenth century. However, the transformation in art took place outside the temples of Buddha.
Japanese Ikebana Flowers History


Therefore, the first flower contest called "Hana-hawase" took place at the festival of flowers during the reign of Ashikaga Yoshimitsu (1358-1408) and due to this fact, the palace was called "The Castle of flowers ".

Over time it has become clear Ikebana art of different styles and schools. During this time, the purpose and the idea of ​​ikebana have changed a bit: in the solemn atmosphere in the temple, to the intimate atmosphere of our house, from the philosophical and religious worship, the allure of the six senses.

In a way, Ikebana reduces life to the dimensions of a container, trying to recreate, reproduce and mimic the natural universe. It is able to make us breathe the fresh air of summer evenings and the nostalgic scent of autumn days. Its beauty is given by simple expressions that convey the splendor and the balance of nature and quiet room. "Through his work, the artist conveys a certain sense of excitement or state Ikebana to the observer. It is a great way to bring something special and interesting in our environment.

The same provision is set at three levels: the top level represents the sky, the middle level, representing the man and the lower level, which represents the earth.

The flowers that make the agreement was made with special care so special that perfectly fit the glass and create harmony when combined. Layer after layer of flowers mixed with the appropriate branches and leaves resulted in a work of art that stresses every component, in part, and expresses what every flower that is supposed to express.

Until 1850, almost all works of art were placed in jars of Ikebana and were mostly vertical. The old style was characterized by numerous restrictions and regulations that prevented him aligning and arranging the flowers in the desires of your heart.

Ohara Unshine stop these rules and began a new style called moribana. It was desirable not only to Japanese architecture, but also for Western-style buildings.

Regardless of style, brings harmony and Ikebana is an eye-candy for us. Due to its three-dimensional effect, which can be considered real floral sculpture. This is the difference between the ikebana and other floral arrangements.

They teach in schools of Ikebana in Japan and more than 3000 schools of Ikebana today. While this art has become a necessity for girls and Japanese women, which is not reserved just for them. Most samurai men have often been masters of the flowers. The men, of whom some of the greatest artists were born, to continue this tradition today.

Humans like to feel safe and have peace and harmony around you. Art is a good solution to the human need for beauty and harmony. It quenches thirst and no art inside, we would be losing a lot of shine!

The human mind is fascinating, and the only barriers are to be built. Few people have the courage to explore their ideas and express them in an art form that is consistent with his personality. An artist is in us all and all it takes is a little searching and experimentation to take outdoors, in doing so, we can bring joy and an extra touch of beauty in the world we live in and the lives of those we around them.

Friday, October 28, 2011

Happily Ever After ... {Printable}

Had a few minutes earlier while Taelor was at school and Kasen took a quick nap after a fun morning at his Fall festival so I made a simple printable perfect for anyone living in their happily ever after life, like me !

I feel very blessed lately and wanted to spread the happiness !

(I have it set to 8x10)

Have a great weekend and Happy Crafting ! ! !

Thursday, October 27, 2011

Pumpkin and Ghost Oh My

Here's a quick last minute craft you can do with your
little Ghost and Goblins before Halloween.

All you need is : construction paper (white for the Ghost and orange for the Pumpkin), streamers ( white for the Ghost/ Green or Black for the Pumpkin), scissors, a glue stick, tape, a hole punch and string (not pictured).
I ended up cutting out the eyes and mouth for my little goblins. Have them glue them on the front of the construction paper, than flip the paper over and using tape (its easier) attach strips of streamers to the bottom of the paper.
Next roll the paper into a tube and tape the sides together, than using the hole punch, make two holes on opposite sides, tie a piece of string or yarn through.
And Boo !!! You've got a Ghost !
Exact same concept for the pumpkin,
either cut out the face or have the little goblins cut them out.
Attach your green (or black) streamer.
And easy as Pumpkin Pie you've got a Pumpkin !
Kasen made both also but didn't want to take the time to take pictures, he just wanted them hung up, those are his in the first picture :)

Wednesday, October 19, 2011

Mickey & Minnie T-Shirts

Hi Everyone !!!I'm back after a much need Vacation and after a week in Sunny California all I want to do it go back !!  We had the best time. We spent five days in Disneyland and attended Mickey's Halloween Party, if you've never been and you love Halloween as much as we do (Halloween is sometimes bigger than Christmas here at the Simply Crafty house) than I HIGHLY recommend it. It was so much fun and there was so much to do. Dancing, Trick-or-Treating, Music, and Villains galore. We will definitely be going back !

Before we even left I wanted to make shirts for our Surfs Up ! Breakfast with Mickey and Friends. Again, if you like doing the Character Breakfasts I HIGHLY recommend this one its so much fun and has double the characters as the other breakfasts. We had gone previously and loved it so much we went again this year and we will more than likely do it every time we go back !!  Any who, I wanted to make us all shirts to wear to the breakfast but nothing to matchy, matchy. So I went with a simple yet cute idea. . .

Start off with a solid color shirt of your choosing..  
Cut out a Mickey Mouse head template onto a piece of card stock,
 I used one cut from my Cricut
but there is tons of templates all over the Internet.
After its all cut out pin to a piece of black felt. And cut that out.
Spray a light layer of Spray adhesive onto the Mickey head.
and center onto the front of your shirt.
If your quick and its off centered you can readjust,
but this stuff is very sticky so be QUICK!
Next, do a light stitch using black thread around the Mickey Head.
And for the girls just add a bow to make your Mickey a Minne
When you're all done sewing, pack your Mickey-tastic shirts and enjoy at your Disneyland vacation or in our case a
 cowabunga Surfs Up Breakfast with Mickey himself.

(The only thing I would have changed after they were all done was , I would have made red shirts for both the boys. Taelor's 'Mickey' didn't show up to well in any of the pictures, but looked great in person)
Anyone have a Disney vacation coming up ? ?
We've been back less than four days and
I'm already planning our next trip !!

Saturday, October 8, 2011

M.I.C.K.E.Y .

Sorry I've been MIA this week ... I've been busy painting, painting and painting some more. I'll be sharing with you soon what I've been painting! But for now I want to share with you the easy-peasy shirt I made for the boys for our Disneyland trip , which we leave for THIS Sunday !!! I'm so excited I've been planning this trip for over three months now and its finally here ! A week in California, four days in Disneyland, one Mickey's Halloween Party equals a Super excited family ! 

Now that my excitement rant is over onto the shirt !
 
First thing first you'll need a plain black shirt.
I bought each little man a shirt for $3.00 each on sale at Target.

Look around your kitchen and find your 'Mikcye'.
I found mine using a bowl and two Olive Garden cups.
Next, I traced the bowl and cups with a white crayon.
Now just follow the white crayon outline with your color choice of puffy paint. I went with orange since it will be Halloween galore when we are in Disneyland and they'll be able to wear it again the week leading up to Halloween.

After tracing with the paint, I let each shirt dry for 24 hours.
And there you have it an easy DIY Mickey Mouse shirt !!

Happy Crafting !!

Thursday, September 29, 2011

Scarecrow Basket

Today was a very craft day here in the Harper Household.
I know on Facebook I mentioned I would be sharing the Fall painting that the boys made today, but can't find the cord to my camera to load the pictures ..aghhh !! ... so instead I'm going to share with you the cute little door decoration I made yesterday (Can't really call it a wreath.)
All I used was a scarecrow from Wal-Mart for .99 cents, a spool of ribbon and a bunch of leaves both from Dollar Tree and a basket I got for .49 cents from Goodwill ... (I know there is orange'ish flowers in the picture below but didn't like this very much so decided against using them)
Simple enough: I cut a piece of ribbon to wrap around the basket, trimmed the leaves to fit around the scarecrow in the basket and ta-da !!
~ Easy-peasy ~

Happy Crafting !

Tuesday, September 20, 2011

Touchdown ! !

After I made my first printable . . I loved it so much and enjoyed making it so much that I've made six (!!) since, and have tons of other ideas for future printable projects. Can't wait to share with you all !

But with Halloween not for a few more weeks, we needed something else to adore our frame on our kitchen counter, so in came this Kickin' Football Printable.


Thursday, September 15, 2011

Art Project Display

 
Do you have a way to display your child art and school projects ? ?
Do you just put them on the fridge ? ?
Or just stick them in a drawer ? ?

We used to just put them on the fridge but after we got a new Stainless Steel Fridge we lost the ability to put them up there .. but to be honest I never really liked them up there, it always looked really cluttered and sometimes they would get wet, from little boys shaking the water off their hands instead of using the towel  4 inches way. So after our old fridge was hauled off I had to come up with a new way/ place to display all their projects. After blog hopping and website 'shopping' I came across a blog (forget the name now)  where the lady glued metal clips to a wire. And although hers turned out awesome I didn't really want to use metal clips, fearing they might rip one of the art pieces if they were even slightly tugged on and I had to metal clips anyway but I did have clothes pins handy. I also didn't have any wire but did have an 8ft long piece of wood, so after a quick cut in half I was on my way to a Masterpiece Display.

I made the ones for my boys months ago but recently my sister-in-law and a good friend had asked me to recreate ones for their little ones.

I started off by clipping the clothes pins on a box so they would be easier to paint.

After cutting the 8ft piece into two pieces,
I sprayed painted each one and once dry I whipped out the trusty tape measure and went to work measuring out equal spacing.  

Next use either a glue gun (my choice)
 or a strong glue to attach the clothes pins to the wood.

Next you can either free write your child's name, use vinyl to place their name on or go to Joanns, pick up a wooden letter, paint and attach like I did. (I need to go back and get the other two letters)


Here's a picture of ours in 'use'.

Monday, September 12, 2011

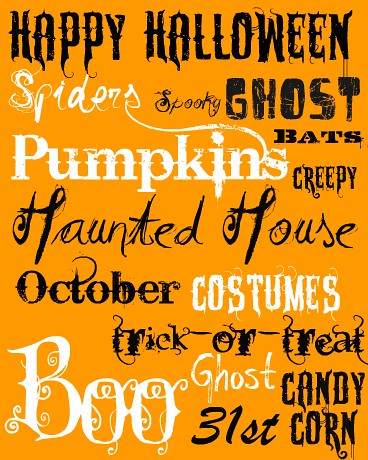
1st Printable {Halloween}

I've been waiting for the perfect time to create my first Printable and with Halloween right around the corner, I thought what better time. . . Because as far we are concerned Halloween is Boo-tastic !!

We absolutely love Halloween here, we like decorating inside and outside, doing crafts galore, eating orange food, going to the pumpkin patch, pretty much everything about Halloween.

So on to my first printable ..completely free for you ...

Click the picture below, print and enjoy !
(I have it set to an 8x10.)


Simply Crafty Halloween Printable by Simply Crafty

Friday, September 2, 2011

Sunny Arizona Days


This pass week, here in Tucson we were over 105 all week, which makes it miserable to be outside for longer than its takes to get from the a/c in the car to the a/c in the house.


So to keep from going stir crazy we did tons of crafts this week. 


We started with making a cute clothespin sun


 in honor of the sunny Arizona. 


Start off with just a plain paper plate.


And cut in half, or as close to half as you can get.


Than have the little ones paint each half yellow,


on the 'outside' of the plate.


(Side note: I love that when I bring out this tablecloth, the boys automatically know that we're going to be painting)


While the boys were painting, I cut up some ribbon in different lengths.


After the plates were dry (which took all of 5 minutes, in this heat)


We used tape to attach the ribbon to the plate.


On the other yellow half of the plate,


 glue on two googly eyes and a smile.


I had already had some clothespin painted orange and yellow. I gave each one four or each color. So eight clothespins total.


Use a glue stick to attach your two paper plates halves together, and clip the clothes pins on the top (for the rays.)


And if you'd like while your drawing on your smile, you can add an unibrow :) like Kasen did.


  I said it before and I'll say it again, I love easy peasy crafts.


Perfect for after school !

Holy Busy'ness Batman !

Hi There !!!

Sorry I've been MIA for the pass two weeks ("AHHHHH!!!!!") I've been super busy and a lot of changes are going on around here.

I joined the PTA in early August, and volunteered at the first meeting to help organize and come up with games for the schools homecoming night, otherwise known as the Howdy Hop, and that took up way more time than I thought it would. But the end result was a great night had by a ton of Sentia Valley Families. And can I just say I love being a part of the PTA.. I knew once I had little ones in school, I would be a PTA Mom.

Another change is my baby started Preschool three days a week. The first day was very rough for him and Mommy, but the second day he ask for double hugs and kisses and walked right in.

So now that we have a routine going, I'm hoping I'll be able to spend more time crafting and working on projects during preschool.

Hope you all have a fabulous holiday weekend.

P.S. Look for a new kids craft post soon after this one !!

Monday, August 15, 2011

Clothespin Dragonflies (Quick Afterschool Craft)

I love crafts that are quick and easy enough to do after school between the homework and activities. And these clothespins dragon flies are just that ..quick and easy.. but Super cute. All you need is one clothespin, two Popsicle sticks and two googly eyes per dragonfly.

Have your little one color the clothespin however they want .. My little man used a pencil to hold the pin open so he could get all edges colored.

After the clothespins all colored, color both Popsicle sticks too.

Use a hot glue gun to glue on the sticks to the top in an X over the little metal clasp .. and glue the googly eyes on the very tip of the pin.

A front view of Kasen's Dragonfly.

Taelor's dragonflies.

I forgot to take a picture but we attached a thin magnet to the back and hung them on the magnetic board.. perfect to hold on to those school projects your little ones bring home.
Tattoos Picture Page 1 Tattoos Picture Page 2 Tattoos Picture Page 3 Tattoos Picture Page 4 Tattoos Picture Page 5 Tattoos Picture Page 6 Tattoos Picture Page 7 Tattoos Picture Page 8 Tattoos Picture Page 9 Tattoos Picture Page 10 Tattoos Picture Page 11 Tattoos Picture Page 12 Tattoos Picture Page 13 Tattoos Picture Page 14 Tattoos Picture Page 15 Tattoos Picture Page 16 Tattoos Picture Page 17 Tattoos Picture Page 18 Tattoos Picture Page 19 Tattoos Picture Page 20 Tattoos Picture Page 21 Tattoos Picture Page 22 Tattoos Picture Page 23 Tattoos Picture Page 24 Tattoos Picture Page 25 Tattoos Picture Page 26 Tattoos Picture Page 27 Tattoos Picture Page 28 Tattoos Picture Page 29 Tattoos Picture Page 30 Tattoos Picture Page 31 Tattoos Picture Page 32 Tattoos Picture Page 33 Tattoos Picture Page 34 Tattoos Picture Page 35 Tattoos Picture Page 36 Tattoos Picture Page 37 Tattoos Picture Page 38 Tattoos Picture Page 39 Tattoos Picture Page 40 Tattoos Picture Page 41 Tattoos Picture Page 42 Tattoos Picture Page 43 Tattoos Picture Page 44 Tattoos Picture Page 45 Tattoos Picture Page 46 Tattoos Picture Page 47 Tattoos Picture Page 48 Tattoos Picture Page 49 Tattoos Picture Page 50 Tattoos Picture Page 51 Tattoos Picture Page 52 Tattoos Picture Page 53 Tattoos Picture Page 54 Tattoos Picture Page 55 Tattoos Picture Page 56 Tattoos Picture Page 57 Tattoos Picture Page 58 Tattoos Picture Page 59 Tattoos Picture Page 60 Tattoos Picture Page 61 Tattoos Picture Page 62 Tattoos Picture Page 63 Tattoos Picture Page 64 Tattoos Picture Page 65 Tattoos Picture Page 66 Tattoos Picture Page 67 Tattoos Picture Page 68 Tattoos Picture Page 69 Tattoos Picture Page 70 Tattoos Picture Page 71 Tattoos Picture Page 72 Tattoos Picture Page 73 Tattoos Picture Page 74 Tattoos Picture Page 75 Tattoos Picture Page 76 Tattoos Picture Page 77 Tattoos Picture Page 78 Tattoos Picture Page 79 Tattoos Picture Page 80 Tattoos Picture Page 81 Tattoos Picture Page 82 Tattoos Picture Page 83 Tattoos Picture Page 84 Tattoos Picture Page 85 Tattoos Picture Page 86 Tattoos Picture Page 87 Tattoos Picture Page 88 Tattoos Picture Page 89 Tattoos Picture Page 90 Tattoos Picture Page 91 Tattoos Picture Page 92 Tattoos Picture Page 93 Tattoos Picture Page 94 Tattoos Picture Page 95 Tattoos Picture Page 96 Tattoos Picture Page 97 Tattoos Picture Page 98 Tattoos Picture Page 99 Tattoos Picture Page 100 Tattoos Picture Page 101 Tattoos Picture Page 102 Tattoos Picture Page 103 Tattoos Picture Page 104 Tattoos Picture Page 105 Tattoos Picture Page 106 Tattoos Picture Page 107 Tattoos Picture Page 108 Tattoos Picture Page 109 Tattoos Picture Page 110 Tattoos Picture Page 111 Tattoos Picture Page 112 Tattoos Picture Page 113 Tattoos Picture Page 114 Tattoos Picture Page 115 Tattoos Picture Page 116 Tattoos Picture Page 117 Tattoos Picture Page 118 Tattoos Picture Page 119 Tattoos Picture Page 120
Luxury Villa and Home Page 1 Luxury Villa and Home Page 2 Luxury Villa and Home Page 3 Luxury Villa and Home Page 4 Luxury Villa and Home Page 5 Luxury Villa and Home Page 6 Luxury Villa and Home Page 7 Luxury Villa and Home Page 8 Luxury Villa and Home Page 9 Luxury Villa and Home Page 10 Luxury Villa and Home Page 11 Luxury Villa and Home Page 12 Luxury Villa and Home Page 13 Luxury Villa and Home Page 14 Luxury Villa and Home Page 15 Luxury Villa and Home Page 16 Luxury Villa and Home Page 17 Luxury Villa and Home Page 18 Luxury Villa and Home Page 19 Luxury Villa and Home Page 20 Luxury Villa and Home Page 21 Luxury Villa and Home Page 22 Luxury Villa and Home Page 23 Luxury Villa and Home Page 24 Luxury Villa and Home Page 25 Luxury Villa and Home Page 26 Luxury Villa and Home Page 27 Luxury Villa and Home Page 28 Luxury Villa and Home Page 29 Luxury Villa and Home Page 30 Luxury Villa and Home Page 31 Luxury Villa and Home Page 32 Luxury Villa and Home Page 33 Luxury Villa and Home Page 34 Luxury Villa and Home Page 35 Luxury Villa and Home Page 36 Luxury Villa and Home Page 37 Luxury Villa and Home Page 38 Luxury Villa and Home Page 39 Luxury Villa and Home Page 40 Luxury Villa and Home Page 41 Luxury Villa and Home Page 42 Luxury Villa and Home Page 43 Luxury Villa and Home Page 44 Luxury Villa and Home Page 45 Luxury Villa and Home Page 46 Luxury Villa and Home Page 47 Luxury Villa and Home Page 48 Luxury Villa and Home Page 49 Luxury Villa and Home Page 50 Luxury Villa and Home Page 51 Luxury Villa and Home Page 52 Luxury Villa and Home Page 53 Luxury Villa and Home Page 54 Luxury Villa and Home Page 55 Luxury Villa and Home Page 56 Luxury Villa and Home Page 57 Luxury Villa and Home Page 58 Luxury Villa and Home Page 59 Luxury Villa and Home Page 60 Luxury Villa and Home Page 61 Luxury Villa and Home Page 62 Luxury Villa and Home Page 63 Luxury Villa and Home Page 64 Luxury Villa and Home Page 65 Luxury Villa and Home Page 66 Luxury Villa and Home Page 67 Luxury Villa and Home Page 68 Luxury Villa and Home Page 69 Luxury Villa and Home Page 70 Luxury Villa and Home Page 71 Luxury Villa and Home Page 72 Luxury Villa and Home Page 73 Luxury Villa and Home Page 74 Luxury Villa and Home Page 75 Luxury Villa and Home Page 76 Luxury Villa and Home Page 77 Luxury Villa and Home Page 78 Luxury Villa and Home Page 79 Luxury Villa and Home Page 80 Luxury Villa and Home Page 81 Luxury Villa and Home Page 82 Luxury Villa and Home Page 83 Luxury Villa and Home Page 84 Luxury Villa and Home Page 85 Luxury Villa and Home Page 86 Luxury Villa and Home Page 87 Luxury Villa and Home Page 88 Luxury Villa and Home Page 89 Luxury Villa and Home Page 90 Luxury Villa and Home Page 91 Luxury Villa and Home Page 92 Luxury Villa and Home Page 93 Luxury Villa and Home Page 94 Luxury Villa and Home Page 95 Luxury Villa and Home Page 96 Luxury Villa and Home Page 97 Luxury Villa and Home Page 98 Luxury Villa and Home Page 99
Famous People Page 1 Famous People Page 2 Famous People Page 3 Famous People Page 4 Famous People Page 5 Famous People Page 6 Famous People Page 7 Famous People Page 8 Famous People Page 9 Famous People Page 10 Famous People Page 11 Famous People Page 12 Famous People Page 13 Famous People Page 14 Famous People Page 15 Famous People Page 16 Famous People Page 17 Famous People Page 18 Famous People Page 19 Famous People Page 20 Famous People Page 21 Famous People Page 22 Famous People Page 23 Famous People Page 24 Famous People Page 25 Famous People Page 26 Famous People Page 27 Famous People Page 28 Famous People Page 29 Famous People Page 30 Famous People Page 31 Famous People Page 32 Famous People Page 33 Famous People Page 34 Famous People Page 35 Famous People Page 36 Famous People Page 37 Famous People Page 38 Famous People Page 39 Famous People Page 40 Famous People Page 41 Famous People Page 42 Famous People Page 43 Famous People Page 44 Famous People Page 45 Famous People Page 46 Famous People Page 47 Famous People Page 48 Famous People Page 49 Famous People Page 50 Famous People Page 51 Famous People Page 52 Famous People Page 53 Famous People Page 54 Famous People Page 55 Famous People Page 56 Famous People Page 57 Famous People Page 58 Famous People Page 59 Famous People Page 60 Famous People Page 61 Famous People Page 62 Famous People Page 63 Famous People Page 64 Famous People Page 65 Famous People Page 66 Famous People Page 67 Famous People Page 68 Famous People Page 69 Famous People Page 70 Famous People Page 71 Famous People Page 72 Famous People Page 73 Famous People Page 74 Famous People Page 75 Famous People Page 76 Famous People Page 77 Famous People Page 78 Famous People Page 79 Famous People Page 80 Famous People Page 81 Famous People Page 82 Famous People Page 83 Famous People Page 84 Famous People Page 85 Famous People Page 86 Famous People Page 87 Famous People Page 88 Famous People Page 89 Famous People Page 90 Famous People Page 91 Famous People Page 92 Famous People Page 93 Famous People Page 94 Famous People Page 95 Famous People Page 96 Famous People Page 97 Famous People Page 98 Famous People Page 99 Famous People Page 100 Famous People Page 101 Famous People Page 102 Famous People Page 103 Famous People Page 104 Famous People Page 105 Famous People Page 106 Famous People Page 107 Famous People Page 108 Famous People Page 109 Famous People Page 110 Famous People Page 111 Famous People Page 112 Famous People Page 113 Famous People Page 114 Famous People Page 115 Famous People Page 116 Famous People Page 117 Famous People Page 118 Famous People Page 119 Famous People Page 120